How to Send Emails with Your Facebook Chatbot
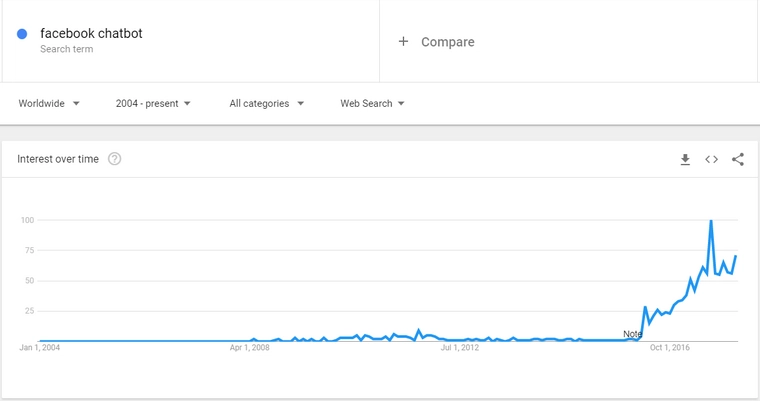
Facebook chatbots are quickly becoming one of the fastest-growing trends for modern marketers. If you look at the interest over time it’s been quickly rising in the past few years.
They can engage your customers and answer their questions, helping to keep the conversation going with virtually no effort.
The powerful automation doesn’t stop there though, chatbots now can also collect data and send it straight to your inbox.
This is useful for a wide range of things including:
- Generating leads
- Providing support to your customers.
- Managing a record of customer information.
- Centralizing all your customer communication into one place.
In this guide we’ll teach you step by step how to make a Facebook chatbot that asks a few questions to your users, and then delivers their responses to your email address.
Collecting and Emailing Feedback from Your Chatbot
Before you start this guide please make sure you have first completed our guide on how to create your Facebook chatbot. This will teach you how to set up your first chatbot and connect it so you can follow along with this tutorial.
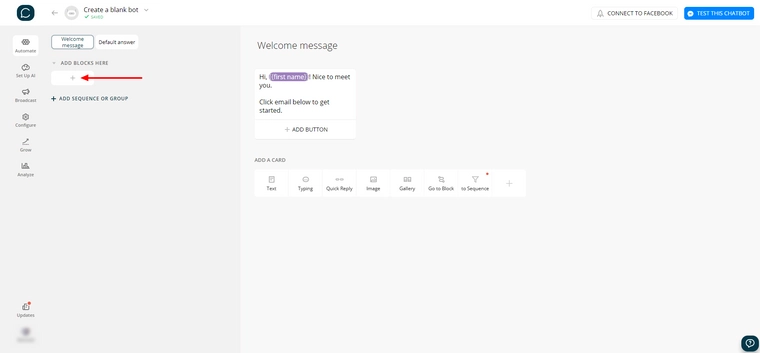
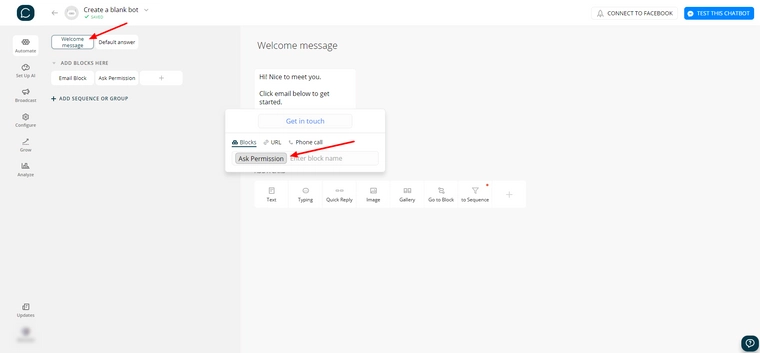
For the purpose of this exercise, we’ve created a test chatbot with a simple welcome message, nothing fancy.
The first thing we’re going to do is add a new block, this block will collect our user’s email address and message to send to us in an email.
Start by adding a new block:
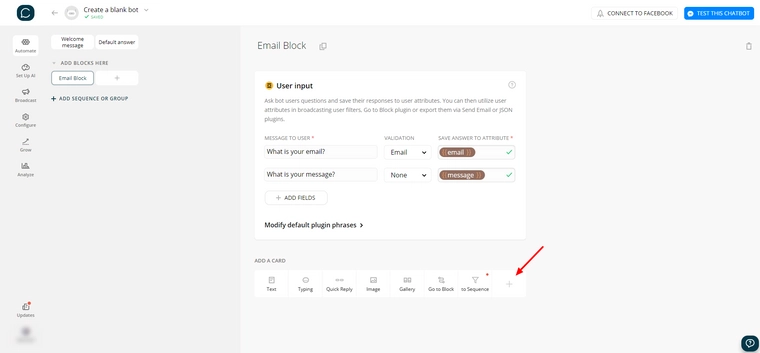
Next we’re going to give our block a descriptive name, we’ve called ours “Email Block”, and then we’ll click the plus symbol below the “add a card” section to expand the cards available for us to add to our block.
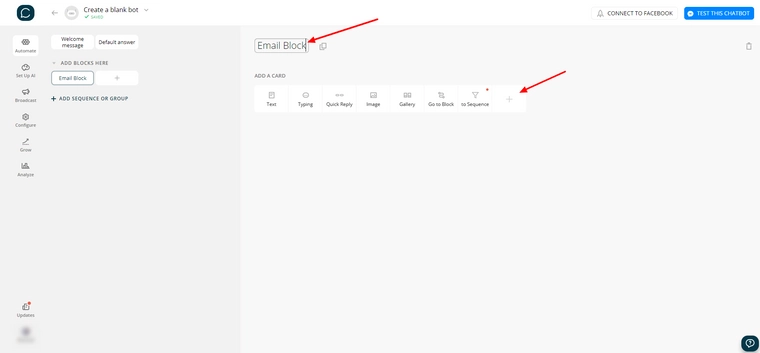
For a quick reminder, cards can be a message, such as an image or text, or an action, such as sending an email or simulating typing for a second.
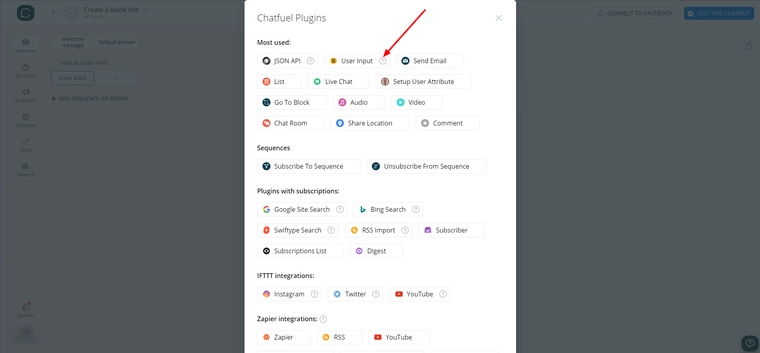
Select “User Input” from the list of options:
Your block should now look something like this:
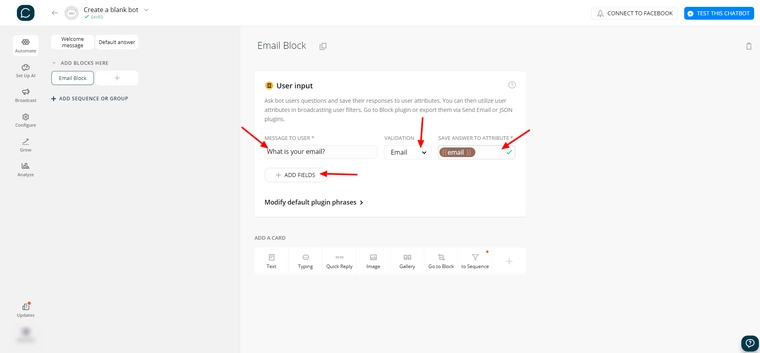
The user input card asks the user questions and saves their responses to attributes. Attributes are like storage on information about the user that you can use later.
Write your first question in the field below “message to user”, we’re going to ask the user “What is your email?”, then select “Email” from the dropdown for validation and type “email” into the field below “save answer to attribute”.
We can reference this field later using the text “{{email}}” (the double curly braces indicate to Chatfuel that you are referencing an attribute).
Once you’ve done that, click “add fields” to add our next field.
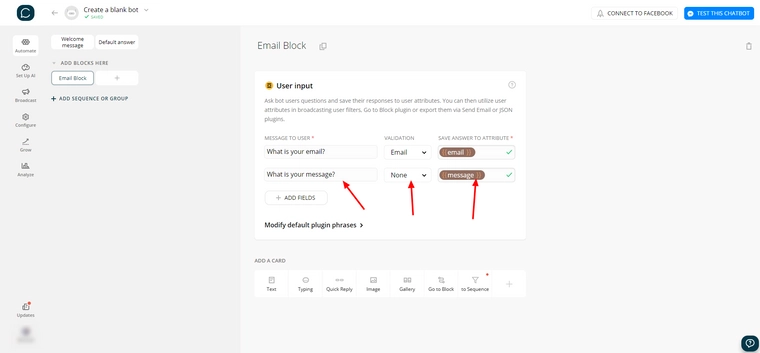
Fill out our next field with our message as “What is your message?”, leaving validation as “none” and set the attribute to “message” so we can reference it later with “{{message}}”.
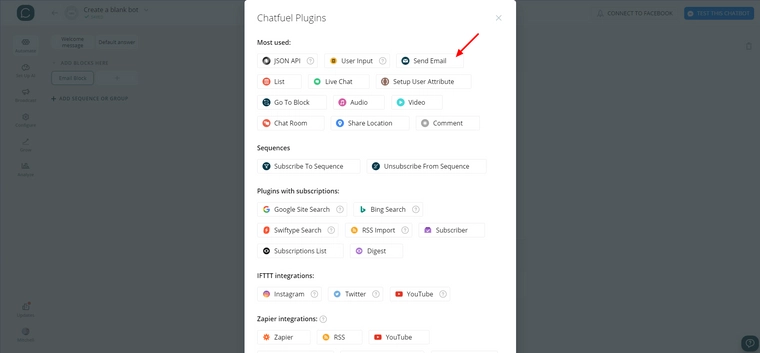
Now we’ve got to send this information somewhere! Click the plus sign below the “add a card” section again to show our list of cards available.
This time select “Send Email” from the list of options.
You should now see an email card in your block like this:
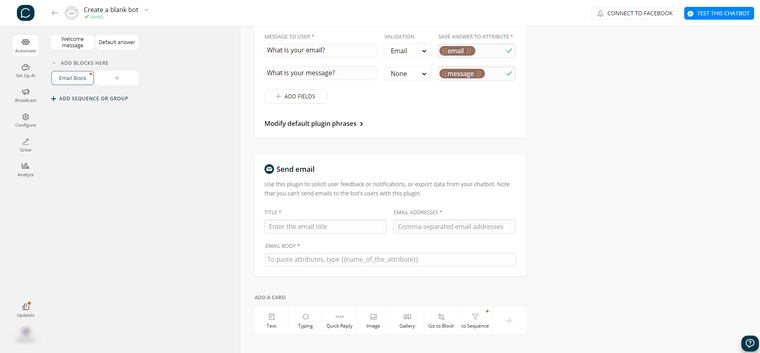
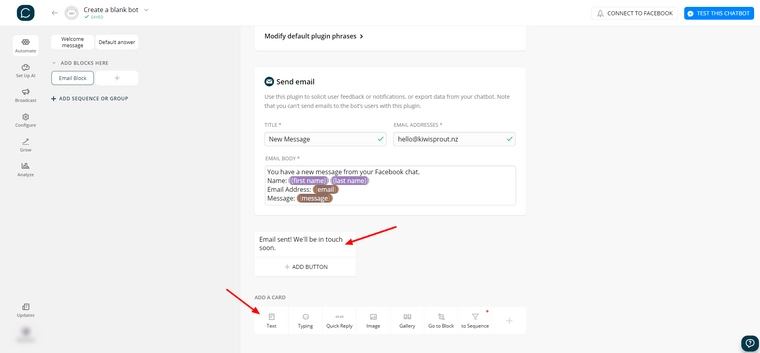
The email card will send our email for us; we can set a subject line, the recipients and the contents of the email.
Give your email a good title, add your email address and past this text into the email body:
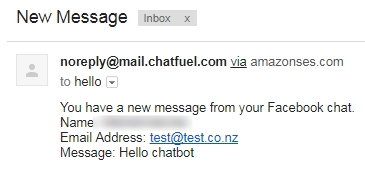
You have a new message from your Facebook chat.
Name: {{first name}} {{last name}}
Email Address: {{email}}
Message: {{message}}
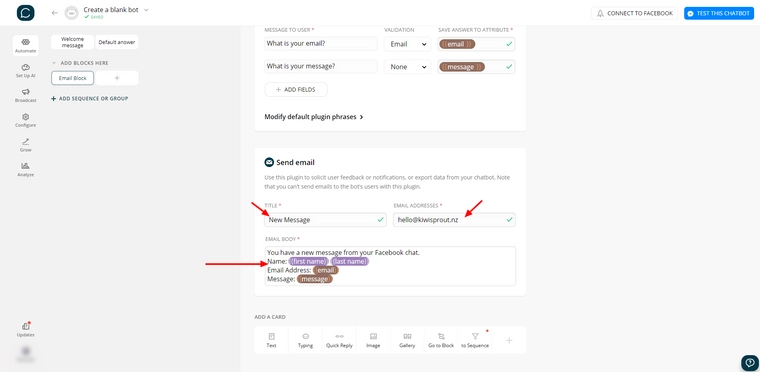
Our first line is just plain text letting them know this is a new email from our chatbot
- Our next line puts the users first name and last name from their Facebook profile into the message using the two attributes {{first name}} and {{last name}}
- The line after that puts the attribute we saved earlier for their email address into the body of our email using the {{email}} attribute.
- And our final line does the same as our previous for the {{message}} attribute we recorded.
Next click the text card at the bottom to add a new text card to the block, and put a simple message in to let them know that the email was successfully sent.
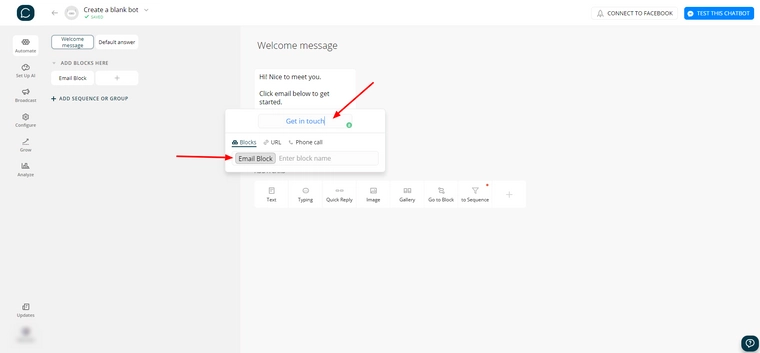
We’ve now finished our email block, but we still have to send our users there from our welcome message. Click the “Welcome message” block on the left-side to open our welcome message block, then click “add button” below our text card.

Give your button a good label like “Get in touch” then type and select your email block to link the button to your email block.
We’re now ready to test it! Click “test this chatbot” in the top right of your screen.
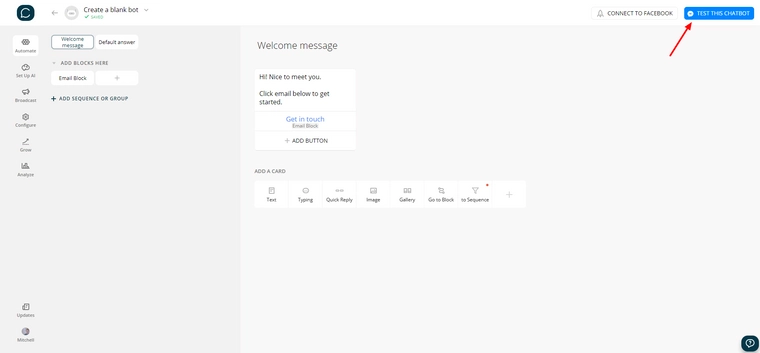
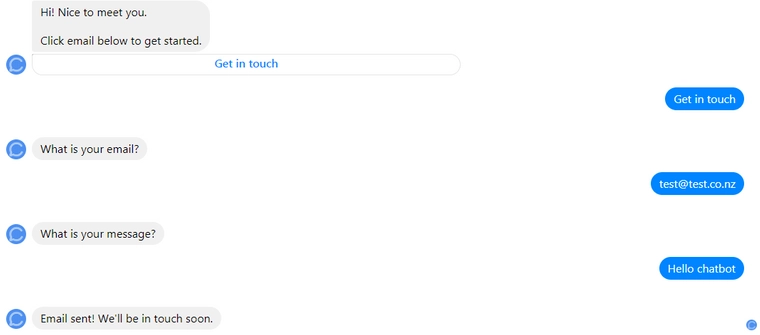
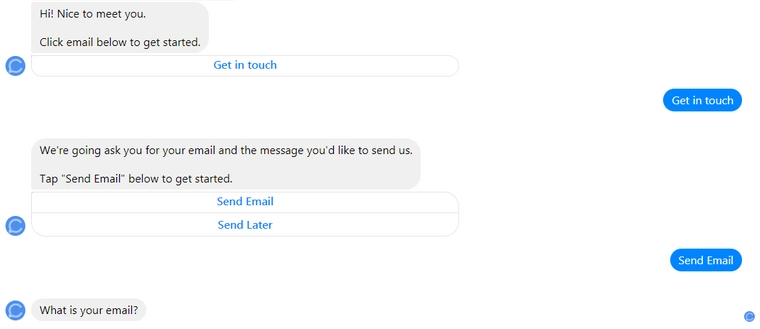
You should receive a message from your chatbot in Facebook Messenger that looks something like this:

Click the button and your chatbot should ask you a few questions then send your responses to your email.
Then if you check your email you should see a new email with your responses:
Your chatbot is now successfully asking questions and sending the answers to your email!
But there’s something we can do to make the experience for users a lot better.
Right now as soon as you click “get in touch” the chatbot will start asking questions and you can’t escape out of this loop until you’ve answered those questions, this can be jarring if they weren’t ready to start composing an email.
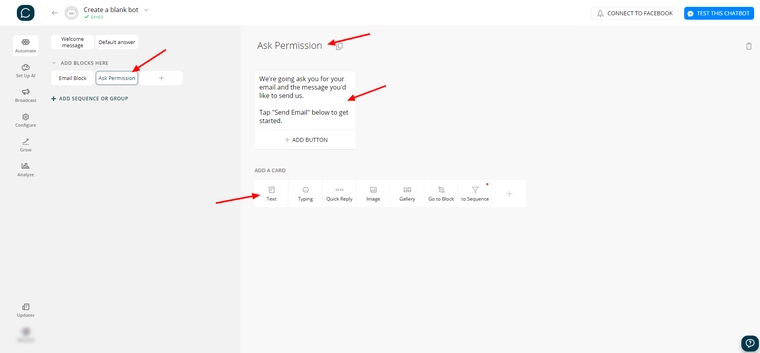
What we’re going to do is create a block that goes between the email and welcome block that tells the user what questions we are going to ask and gives them the opportunity to cancel out of it.
Start by creating a new block and giving it a descriptive name. Next, add a new text card to your block and write a simple message outlining what questions you will ask.
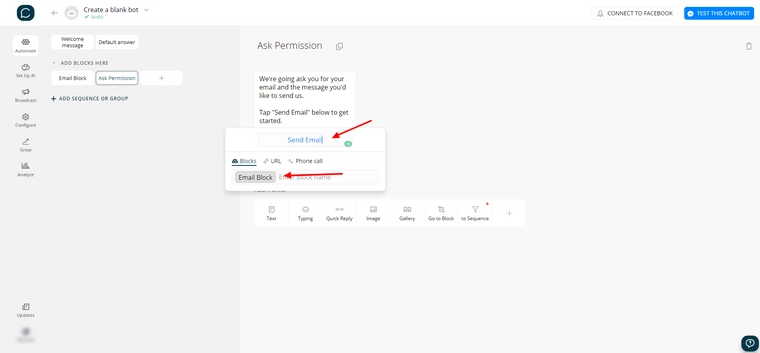
Then add a “Send Email” button that takes you to your email block.
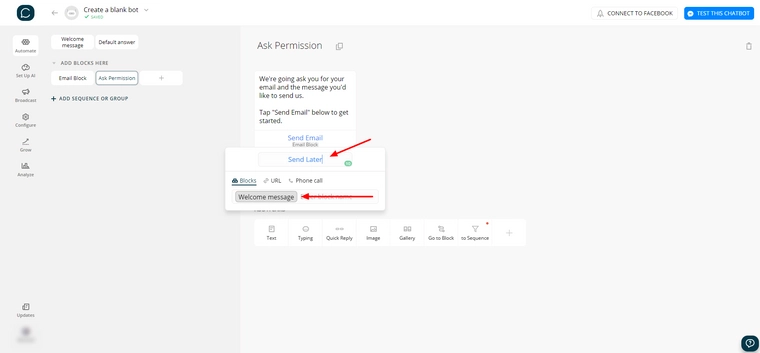
And add a “Send Later” button that takes you back to the welcome message.
Next go back to our welcome message block and replace the linked block for our button from the email block to our new block.
Give it a test run and you should see the chatbot ask if you’d like to continue before it starts to fire questions.
Congratulations! Your facebook chatbot now sends emails straight to your inbox.
Here’s a few ways you could make your chatbot even better:
- Ask more questions to include in your email.
- If someone clicks “Send Later”, take them to a different block that doesn’t loop them back to the welcome message.
- Give users the option to call you instead (we covered how to do that in our first chatbot guide).
If you found reading this blog post helpful, consider subscribing to our newsletter to the right of this blog post get sent our latest posts directly, some of the next blog posts we’ll be writing includes:
- How to create a chatbot that responds to key phrases
- How to add your Facebook chatbot to your website
- How to discover new leads using a chatbot